Custom Notification Media
Before reading this section, please ensure that you have read the content of the “Notification Rules” chapter, and also reviewed the external link materials mentioned in the “Notification Rules” chapter.
Let’s simulate a scenario. Suppose I want to use a WeCom application (not the same as WeCom robot) for alarm notifications. Let’s go through the entire process.
Basic Configuration
- When sending notifications via a WeCom application, we need to know the WeCom account of the person being notified. Nightingale does not have this information by default. We can customize a contact field called
wecomid, and each user can configure it themselves.
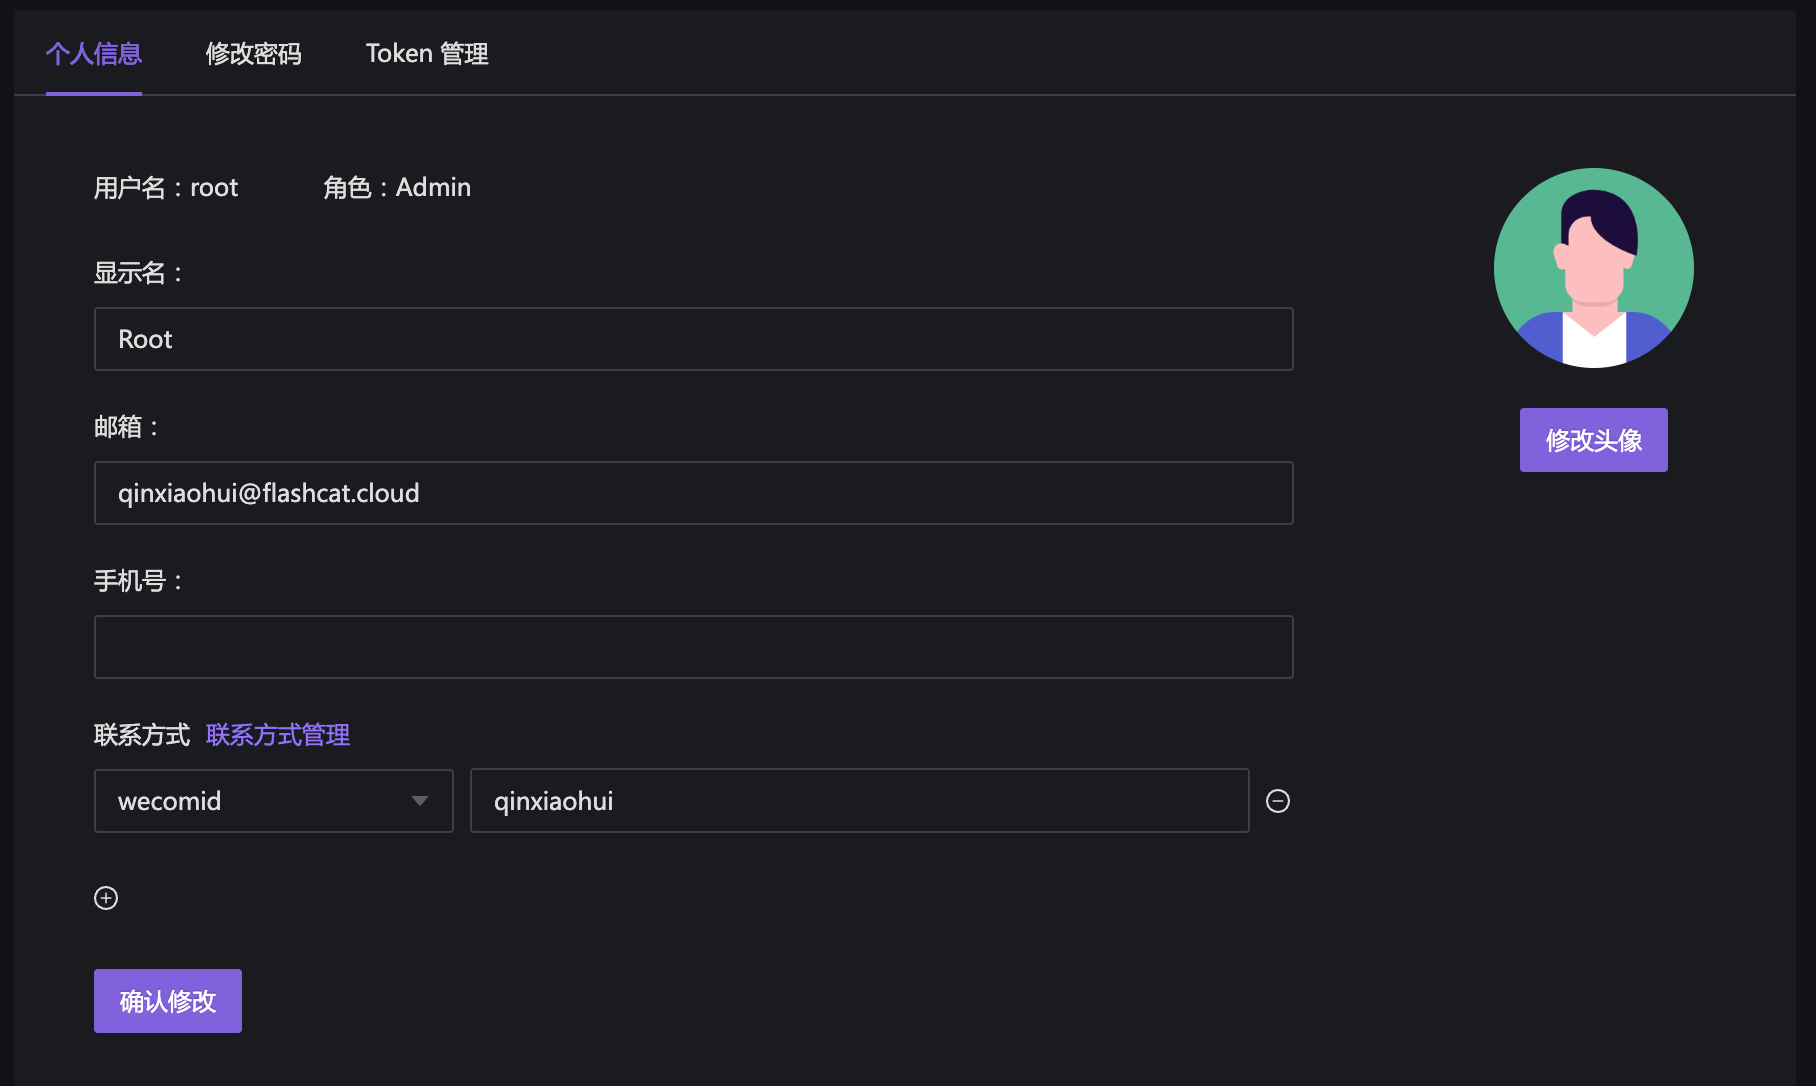
In the image above, wecomid is the custom field name I created. Clicking “Contact Management” (only available to administrators) allows creating new contact methods. Here, I created a new contact method called wecomid to configure each user’s WeCom ID.
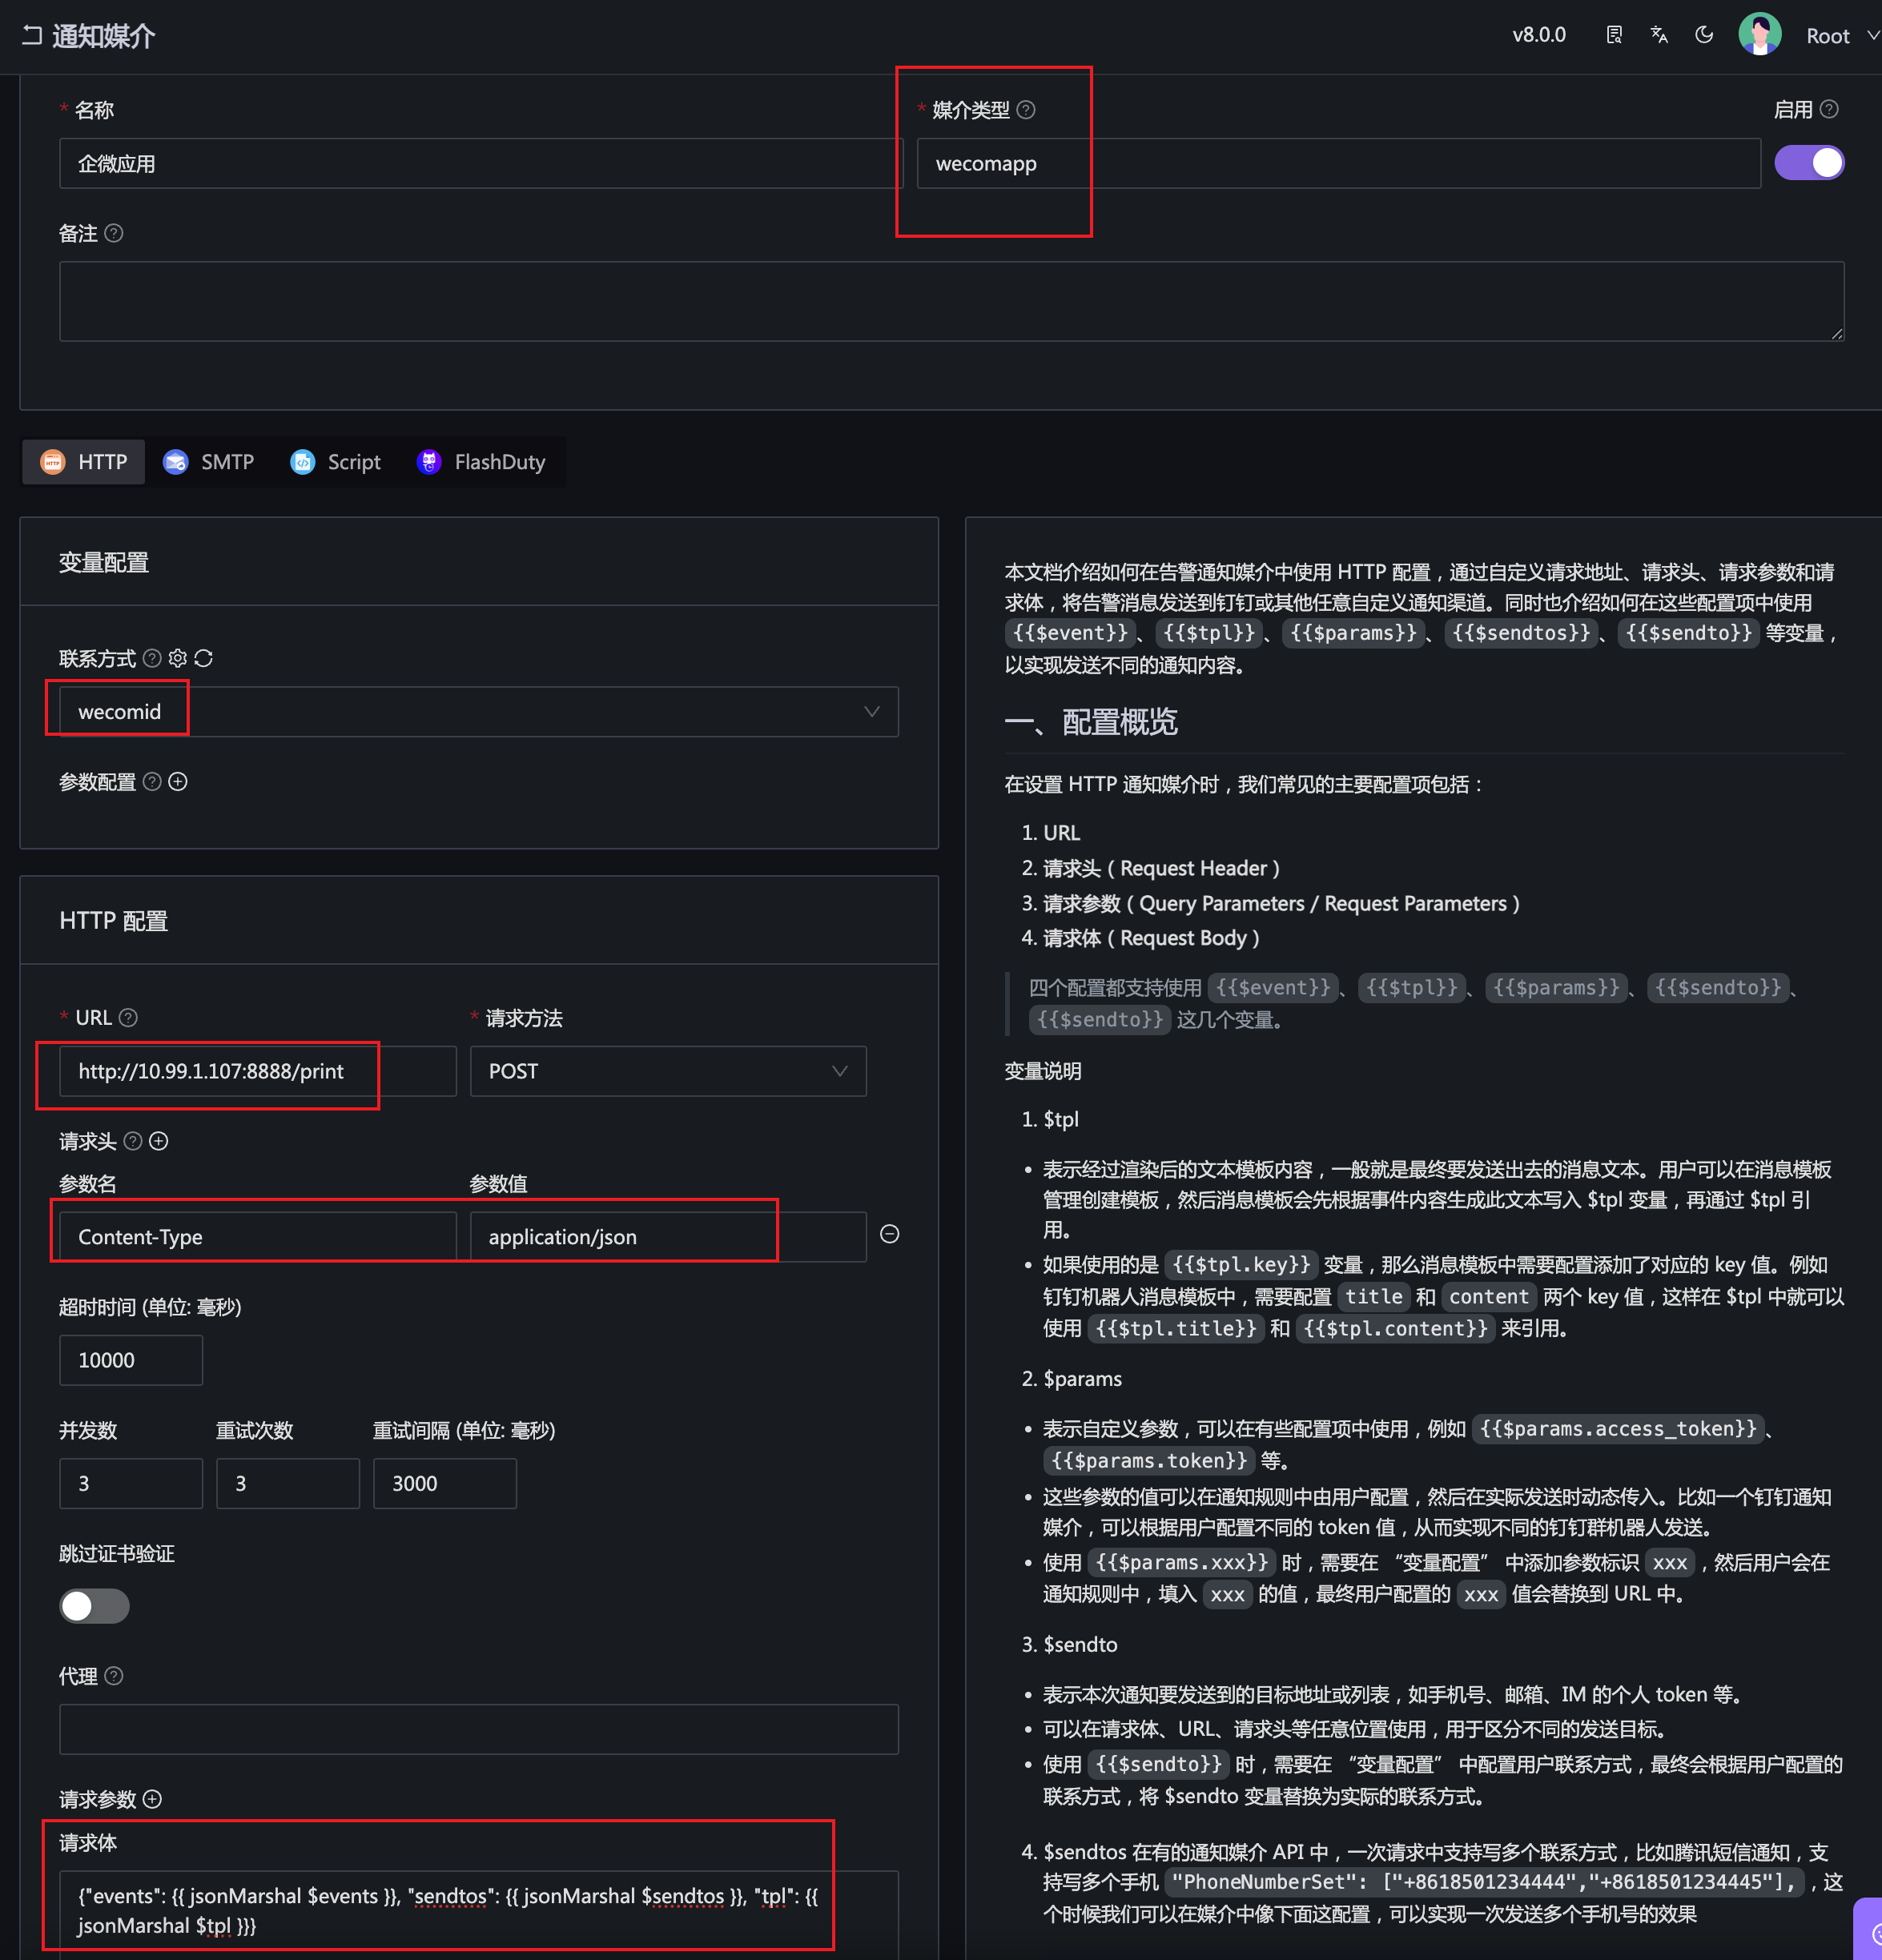
- Create a custom notification medium corresponding to my own program. When a user configures Nightingale to send alarm messages to this notification medium, Nightingale will call my program, which will then call the WeCom API to send notification messages using the WeCom application (of course, this is just a demonstration; I still use the gohttpd applet introduced in the Event Processor chapter for demonstration).
Explanation of several key fields for the notification medium above:
- Medium Type: Can be customized. I randomly named it
wecomapphere. Notification media usually need to work with message templates. As long as the medium type of the message template is alsowecomapp, the medium and message template can be associated. - Contact Method: Select the
wecomidcontact method created earlier. This way, when Nightingale calls my program, it will pass the WeCom ID of thealarm recipientto me. - URL: The address of my program. Nightingale will call this address via HTTP POST, and the content of the request body can be defined below.
- Request Body: Used to define the content of the callback HTTP request body, which can reference several variables. In this example, I referenced all three key variables.
My request body:
{
    "events": {{ jsonMarshal $events }},
    "sendtos": {{ jsonMarshal $sendtos }},
    "tpl": {{ jsonMarshal $tpl }}
}
$eventsis the list of alarm events to be sent. Although it’s a list, the open-source version will always have only one event.$sendtosis the list of recipients, which will eventually be a list of WeCom IDs. If the contact method configured here is Phone,$sendtoswill be a list of phone numbers.$tplis the content of the message template, which will be introduced immediately below.
Message Template
Obviously, when finally calling the WeCom API to send alarm messages, we don’t want to send the entire event JSON, as users won’t be able to read it. We need to format the event for display (e.g., in markdown format), just like other notification media have corresponding message templates. Custom notification media also need message templates. Let’s create a message template:

A message template can have multiple fields (for example, an email template needs custom subject and content, so it has two fields). However, in the WeCom application scenario, multiple fields are not needed. We can just create a content field, and later we can define the content of the content field using markdown format. For example:
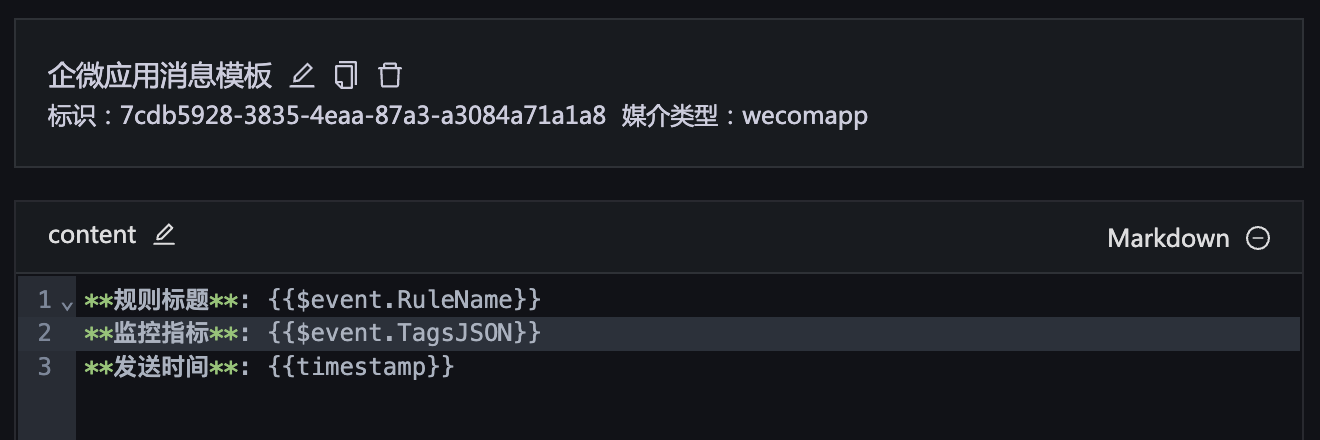
I also paste the content in markdown for your reference:
**Rule Title**: {{$event.RuleName}}
**Monitoring Metric**: {{$event.TagsJSON}}
**Sending Time**: {{timestamp}}
This is just a demonstration, so the fields rendered in markdown are relatively few. You can refer to other templates to enrich the content later.
💡 Note that the medium type of the message template needs to be consistent with that of the notification medium to enable association. Therefore, I still used
wecomapphere.
Testing
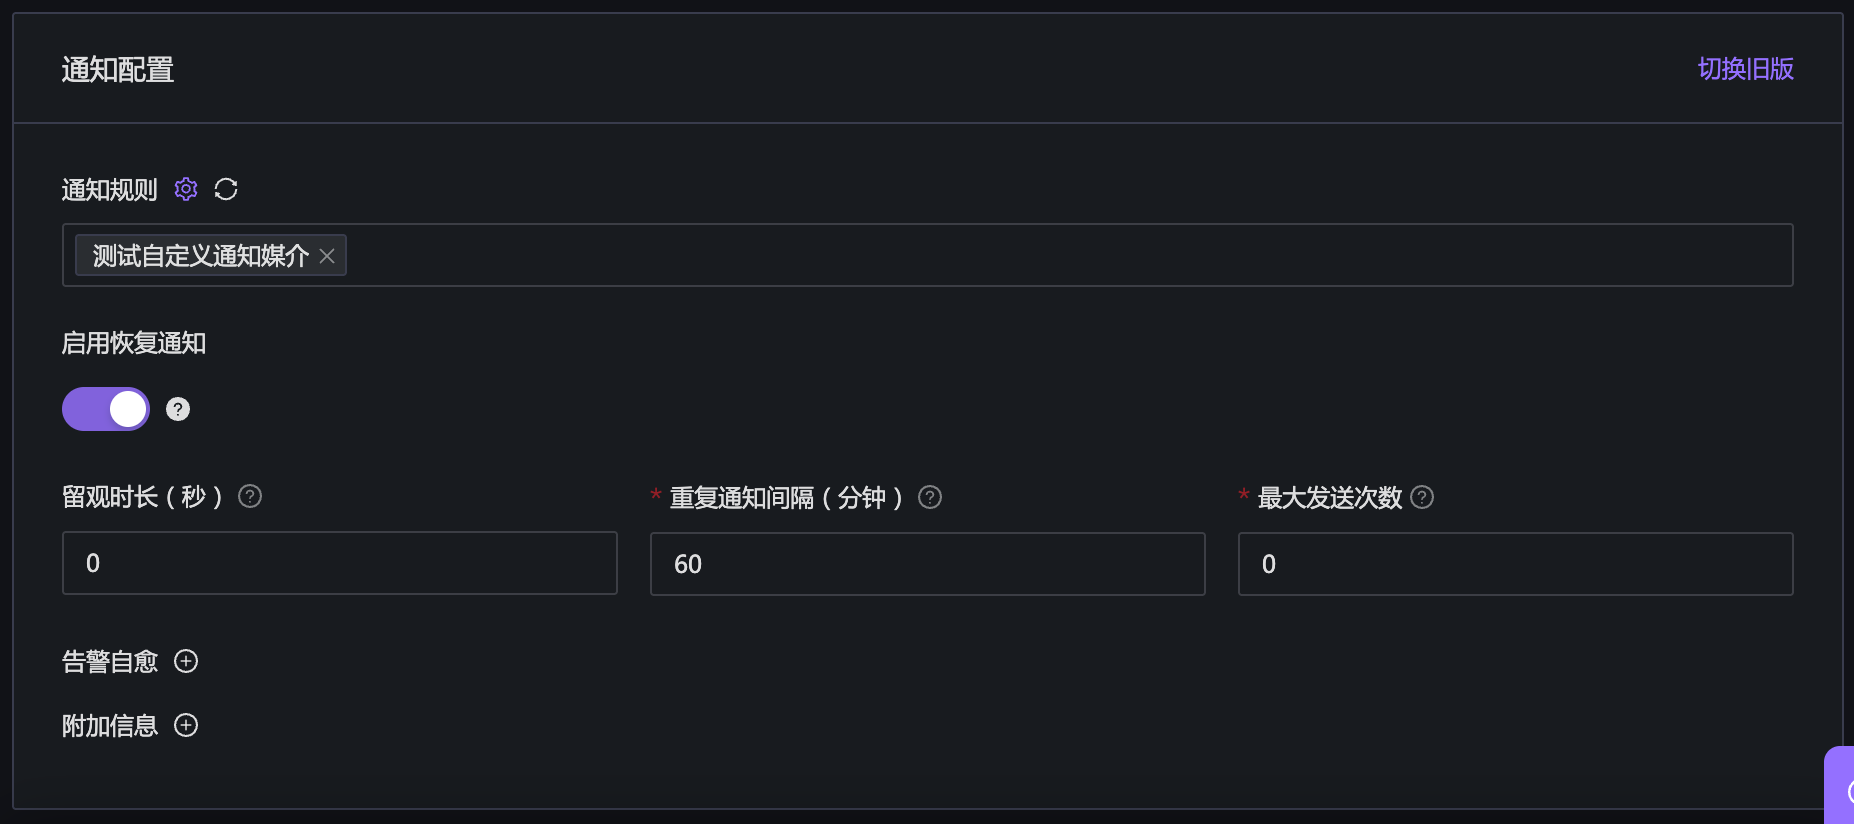
Now we can test it. Create a notification rule:
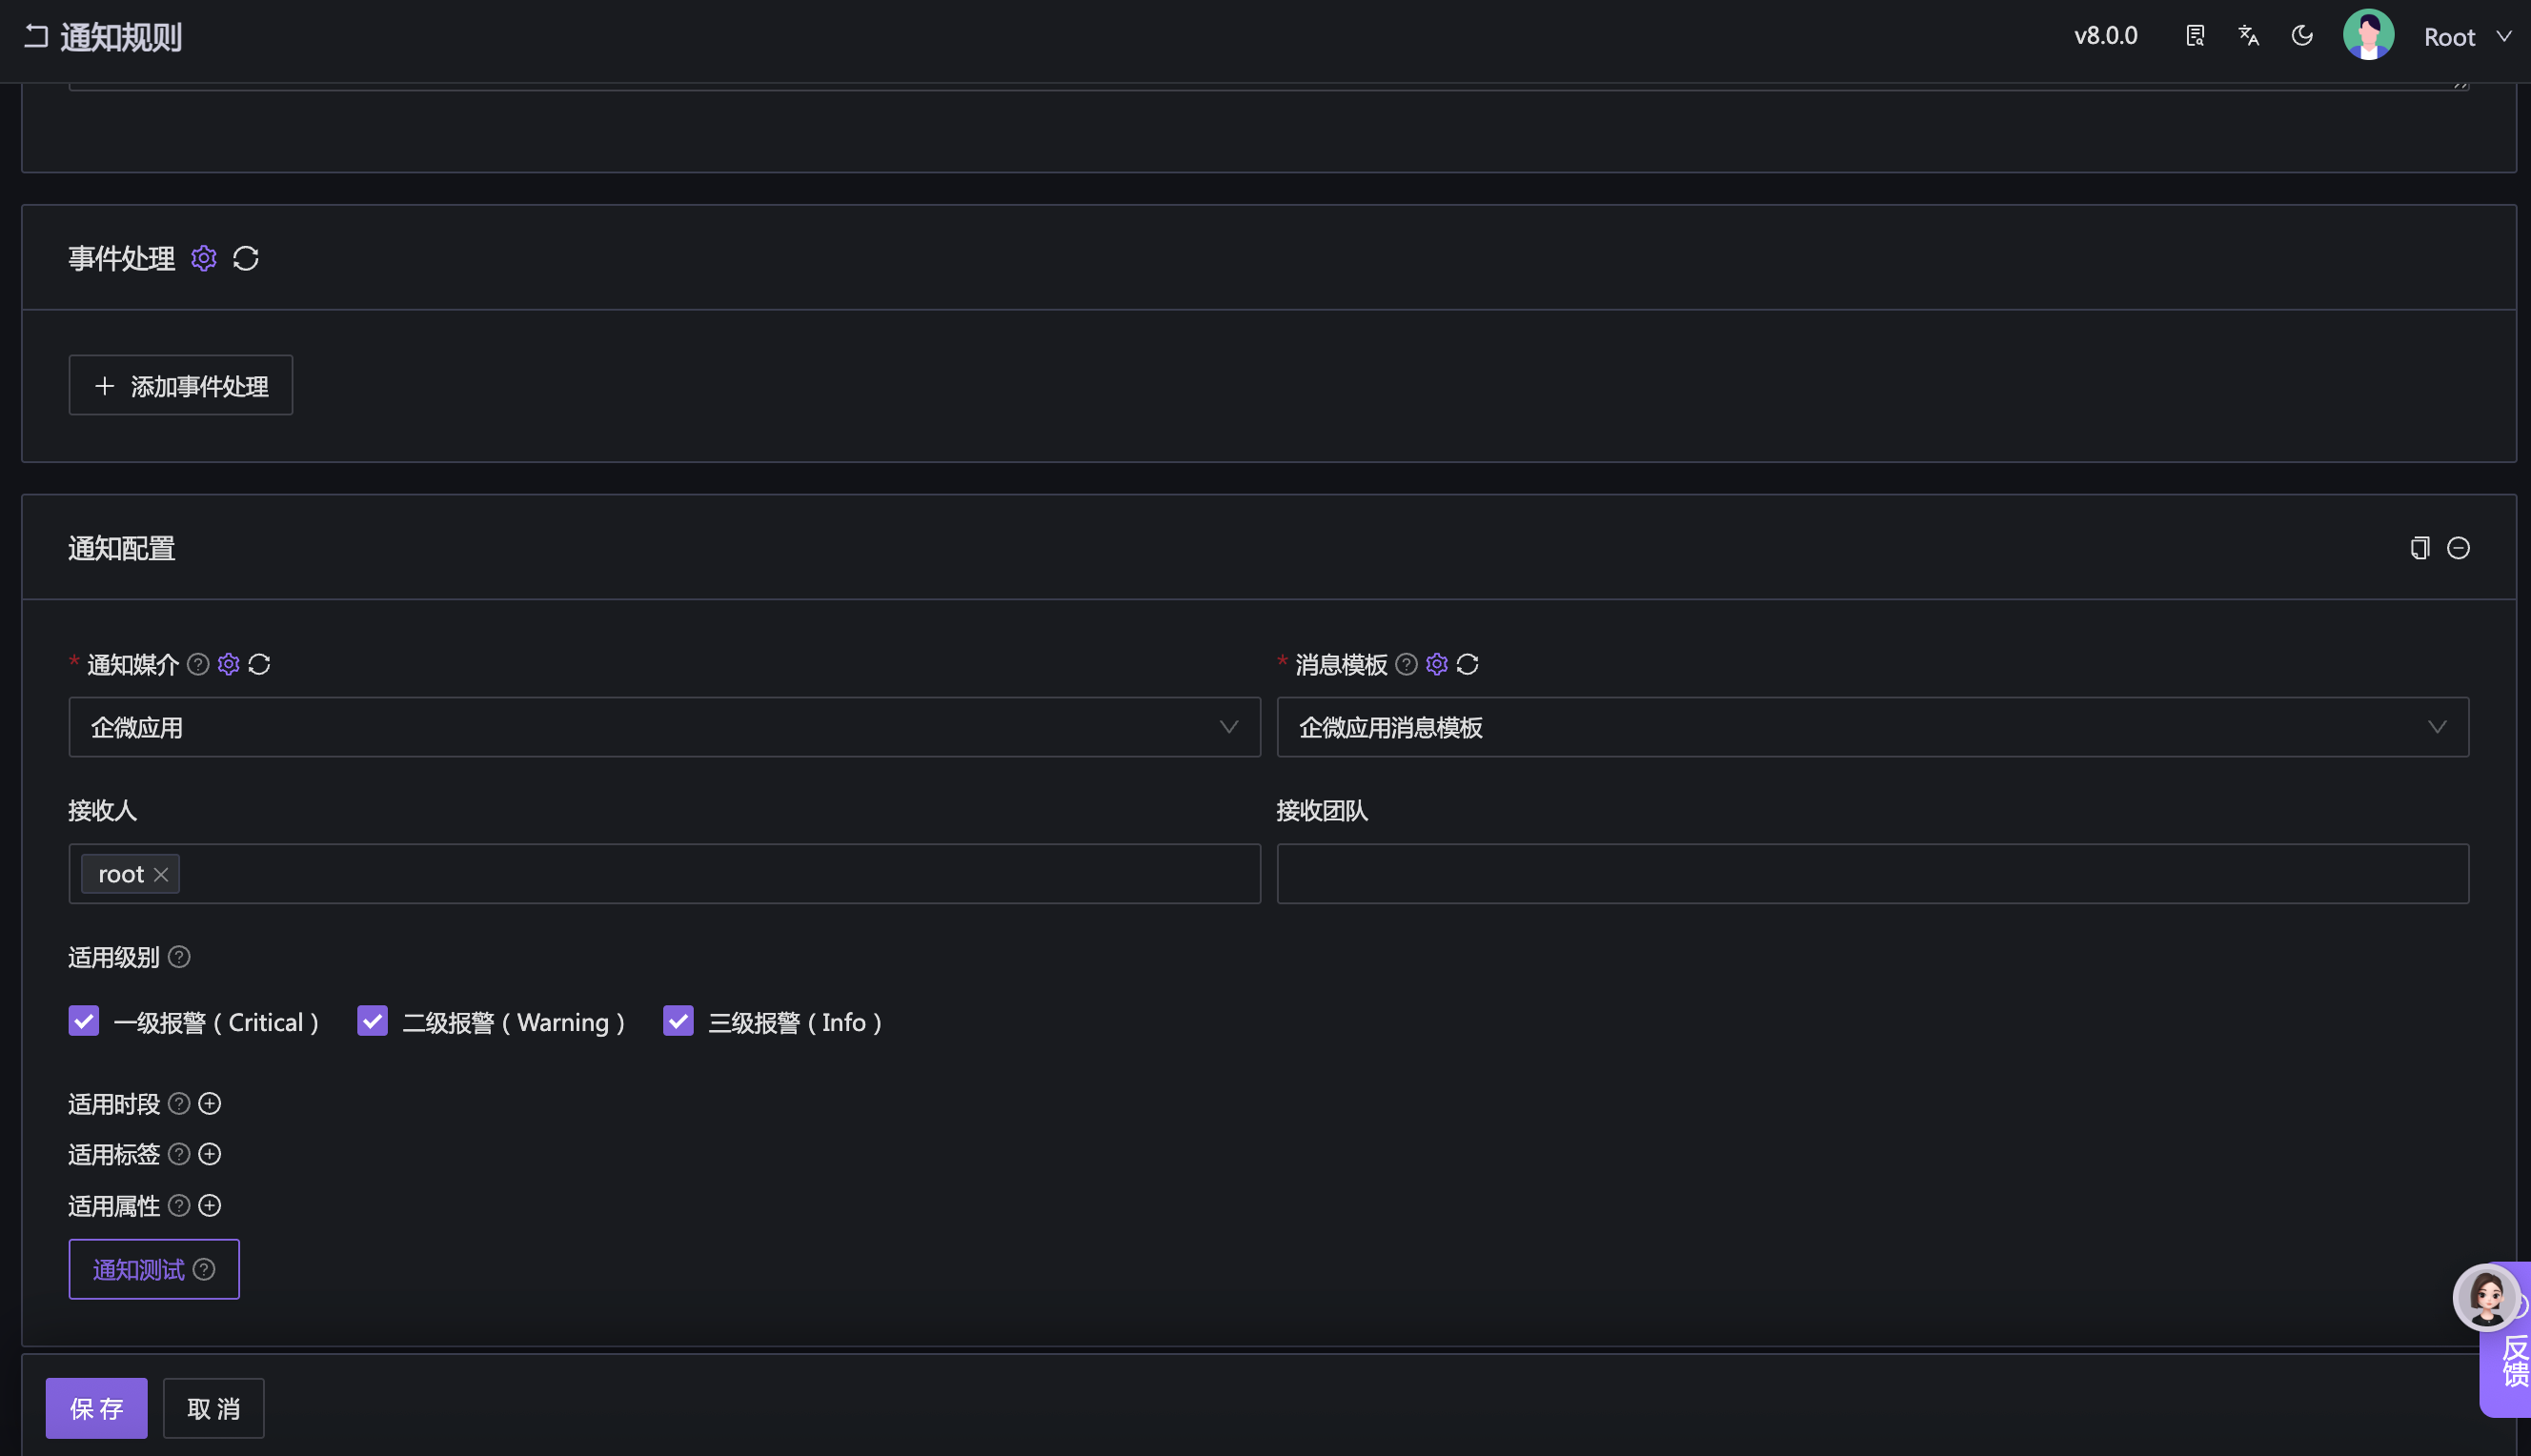
For testing convenience, this notification rule has no filtering conditions configured, meaning any alarm event will be sent to the “WeCom Application” custom notification medium.
Finally, we create an alarm rule and associate it with the notification rule just created:
Wait a moment and check if the http://10.99.1.107:8888/print program receives the callback HTTP request. The result in my environment is as follows:
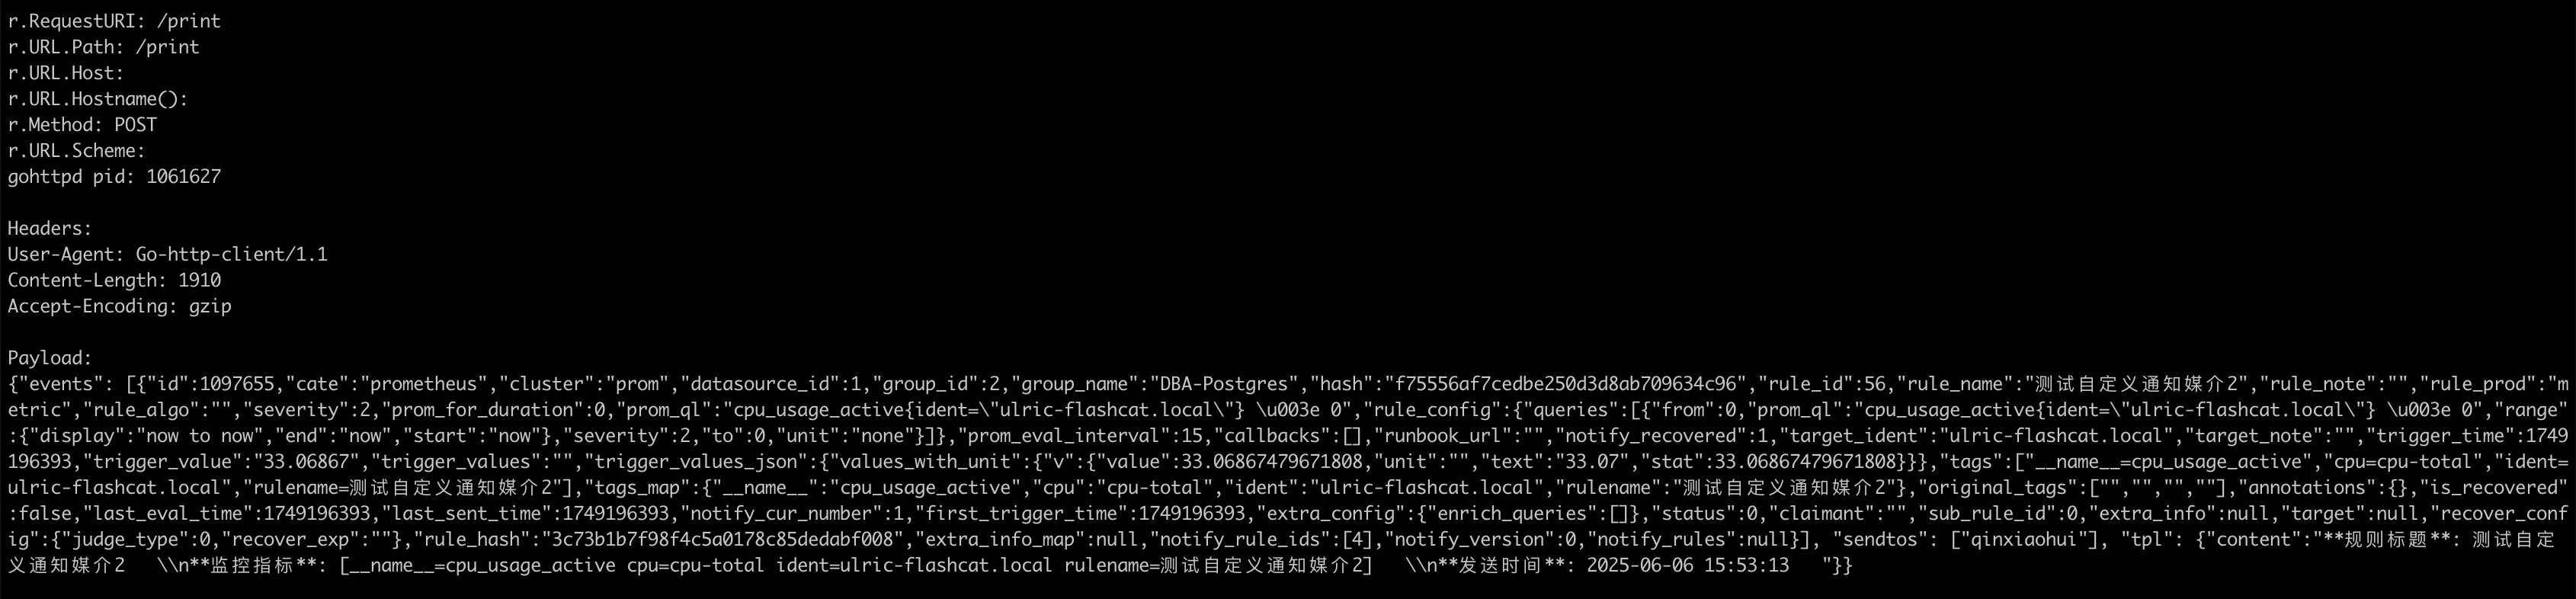
I paste the content of the HTTP request body for your reference:
{
	"events": [{
		"id": 1097655,
		"cate": "prometheus",
		"cluster": "prom",
		"datasource_id": 1,
		"group_id": 2,
		"group_name": "DBA-Postgres",
		"hash": "f75556af7cedbe250d3d8ab709634c96",
		"rule_id": 56,
		"rule_name": "测试自定义通知媒介2",
		"rule_note": "",
		"rule_prod": "metric",
		"rule_algo": "",
		"severity": 2,
		"prom_for_duration": 0,
		"prom_ql": "cpu_usage_active{ident=\"ulric-flashcat.local\"} \u003e 0",
		"rule_config": {
			"queries": [{
				"from": 0,
				"prom_ql": "cpu_usage_active{ident=\"ulric-flashcat.local\"} \u003e 0",
				"range": {
					"display": "now to now",
					"end": "now",
					"start": "now"
				},
				"severity": 2,
				"to": 0,
				"unit": "none"
			}]
		},
		"prom_eval_interval": 15,
		"callbacks": [],
		"runbook_url": "",
		"notify_recovered": 1,
		"target_ident": "ulric-flashcat.local",
		"target_note": "",
		"trigger_time": 1749196393,
		"trigger_value": "33.06867",
		"trigger_values": "",
		"trigger_values_json": {
			"values_with_unit": {
				"v": {
					"value": 33.06867479671808,
					"unit": "",
					"text": "33.07",
					"stat": 33.06867479671808
				}
			}
		},
		"tags": ["__name__=cpu_usage_active", "cpu=cpu-total", "ident=ulric-flashcat.local", "rulename=测试自定义通知媒介2"],
		"tags_map": {
			"__name__": "cpu_usage_active",
			"cpu": "cpu-total",
			"ident": "ulric-flashcat.local",
			"rulename": "测试自定义通知媒介2"
		},
		"original_tags": ["", "", "", ""],
		"annotations": {},
		"is_recovered": false,
		"last_eval_time": 1749196393,
		"last_sent_time": 1749196393,
		"notify_cur_number": 1,
		"first_trigger_time": 1749196393,
		"extra_config": {
			"enrich_queries": []
		},
		"status": 0,
		"claimant": "",
		"sub_rule_id": 0,
		"extra_info": null,
		"target": null,
		"recover_config": {
			"judge_type": 0,
			"recover_exp": ""
		},
		"rule_hash": "3c73b1b7f98f4c5a0178c85dedabf008",
		"extra_info_map": null,
		"notify_rule_ids": [4],
		"notify_version": 0,
		"notify_rules": null
	}],
	"sendtos": ["qinxiaohui"],
	"tpl": {
		"content": "**规则标题**: 测试自定义通知媒介2   \\n**监控指标**: [__name__=cpu_usage_active cpu=cpu-total ident=ulric-flashcat.local rulename=测试自定义通知媒介2]   \\n**发送时间**: 2025-06-06 15:53:13   "
	}
}
This request body contains not only event details but also tpl, which is the rendered content. You can directly use this content to call the WeCom API. sendtos is a list of WeCom IDs. Since we configured the contact method in the WeCom application notification medium as wecomid, sendtos will be a list of WeCom IDs. If you configure the contact method in the notification medium as Phone, sendtos will be a list of phone numbers.
With all the data obtained, the next step is your custom logic and calling the WeCom API. Here, I used gohttpd just to demonstrate the content of the request body. Obviously, the gohttpd tool does not have the ability to send WeCom application messages. You need to implement this logic yourself: write a program that listens on an HTTP port, provides an HTTP POST interface (like gohttpd above), receives callback requests from Nightingale, parses the request body, retrieves event details, recipient lists, and message template content, and finally calls the WeCom API to send messages.