Event Processor
Event Processor is a concept introduced in Nightingale v8. After an alert event is generated, before sending notifications, Event Processors can be used to perform additional processing on the alert event. The open-source version supports 5 types of processors: Relabel, Callback, Event Update, Event Drop, and AI Summary. Different processors can form a Pipeline to perform a series of flexible processing on alert events. Examples of scenarios include:
- Integrating with internal CMDB to attach more abundant information to alert events
- Calling DeepSeek’s API to perform intelligent analysis on alert events and attach the analysis results to the alert events
- Sending all alert events to your own system, which is equivalent to mirroring a copy for subsequent analysis and processing
- Dropping some specific alert events, such as some recovery events that you don’t want to send notifications for
Several concepts are involved here: notification rules, event processors, and event processing pipelines. A brief explanation:
- A notification rule can configure multiple event processing pipelines (Pipeline), which are executed in sequence
- An event processing pipeline (Pipeline) can configure multiple event processors (Processor), also executed in sequence

As can be seen from the above screenshot, the entry menu is in Notifications - Rules. There may be many notification rules. When adding or editing a specific notification rule, you can see a configuration area for Event Processing, where you can reference multiple pre-created event pipelines (Pipeline). Where to add, delete, or modify event pipelines (Pipeline)? The entry is relatively hidden, in the small gear on the right side of Event Processing. Clicking it will expand a side panel, where you can add, delete, or modify event pipelines (Pipeline).
When creating or editing an event pipeline (Pipeline), a new side panel will expand. In this new side panel, you can edit the Pipeline, and we can configure multiple event processors (Processor) in the Pipeline:

Click Usage Instructions next to the event processor type field to view the usage documentation of the event processor.
Relabel Processor
The Relabel processor is similar to the Relabel operation for monitoring metrics in Prometheus. However, in Nightingale, it is the Relabeling of alert events. Alert events also have label fields, and there is a need to process these labels, so the Relabel processor is provided here.
For specific usage instructions of the Relabel processor, click Usage Instructions next to the event processor type field on the Nightingale page to view them.
Callback Processor
After an event is triggered, Nightingale can notify external systems through Callback, and external systems can perform automated processing based on the event content. For example, I have seen some companies develop their own alert notification systems. Instead of using Nightingale’s notification mechanism, they directly send all alert events to their self-developed systems through the Callback processor.
Here is a simple demonstration:
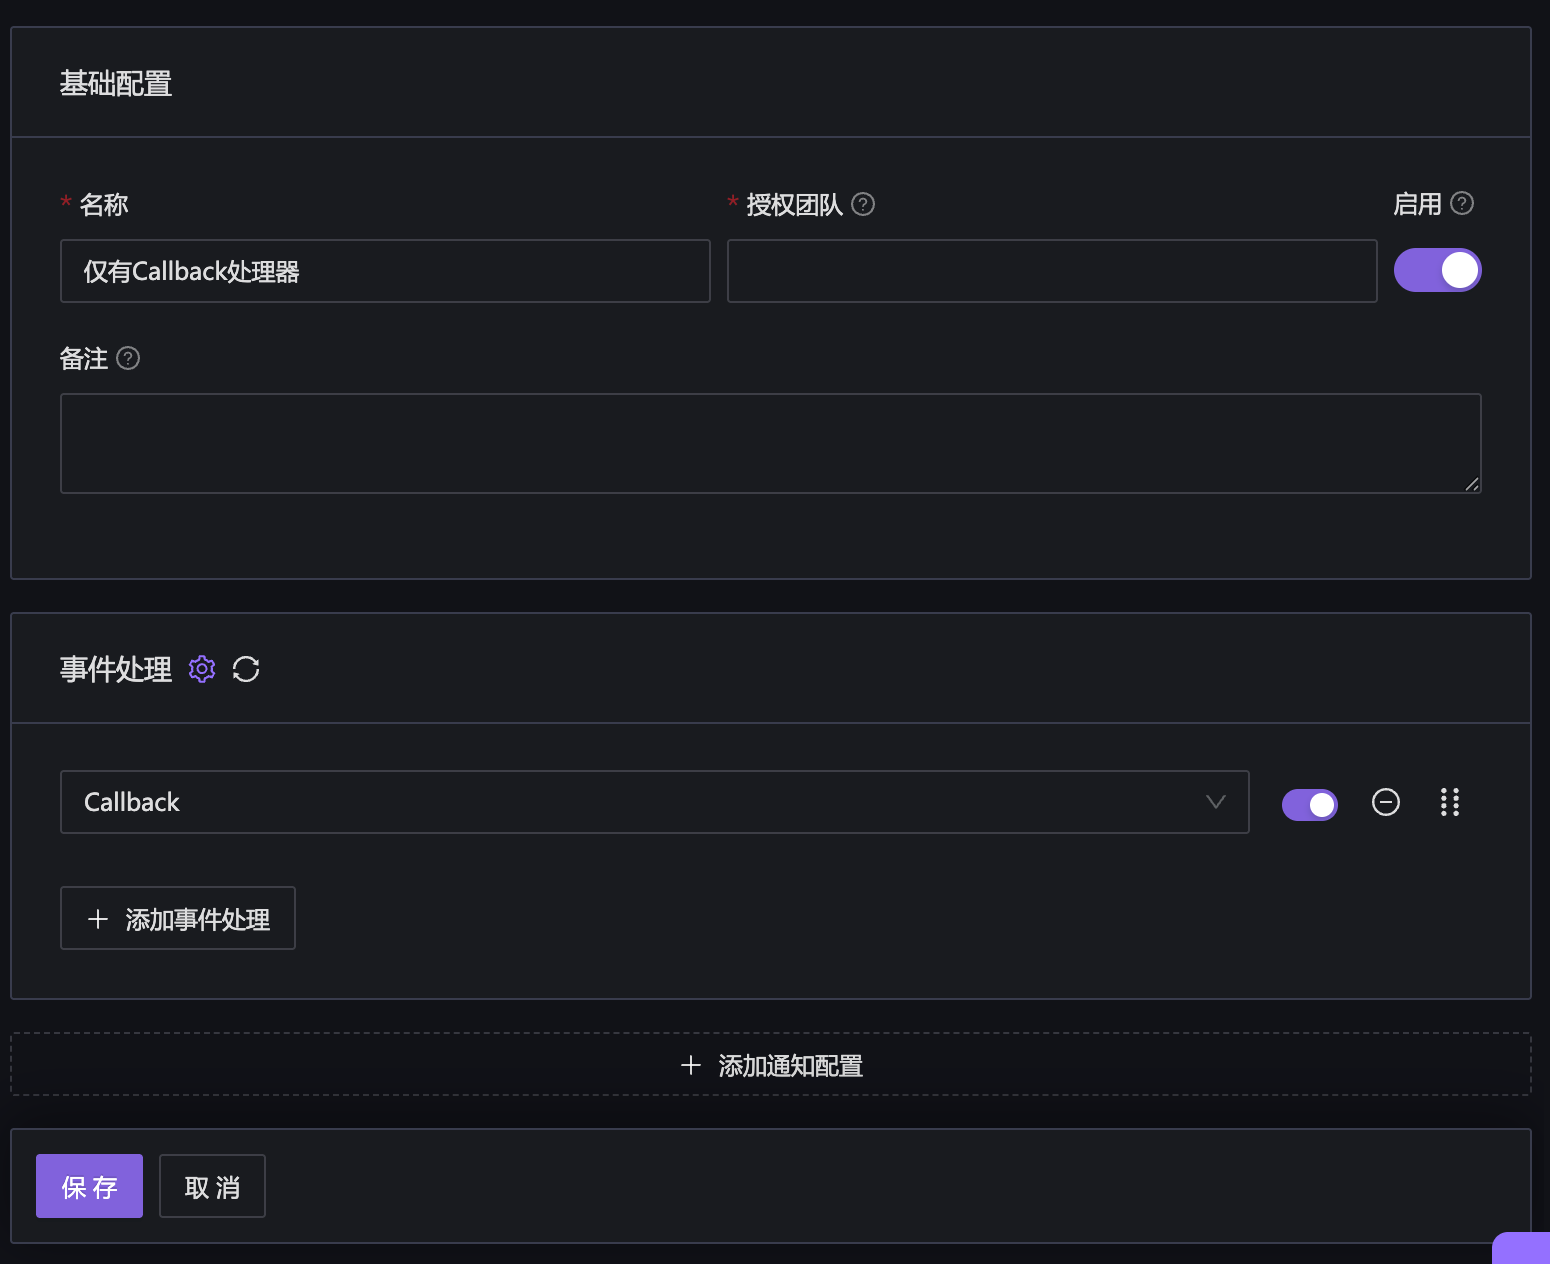
- First, create a “Notification Rule” because the Callback processor belongs to a certain Pipeline, and the Pipeline belongs to a certain notification rule.
- In the “Notification Rule”, reference the event processing Pipeline. The Pipeline needs to be created in advance (on the notification rule editing page, click the small gear on the right side of the processor to open the side panel, and create or edit the Pipeline in the side panel). The following screenshot is a detail page of a Pipeline, which contains a Callback processor.
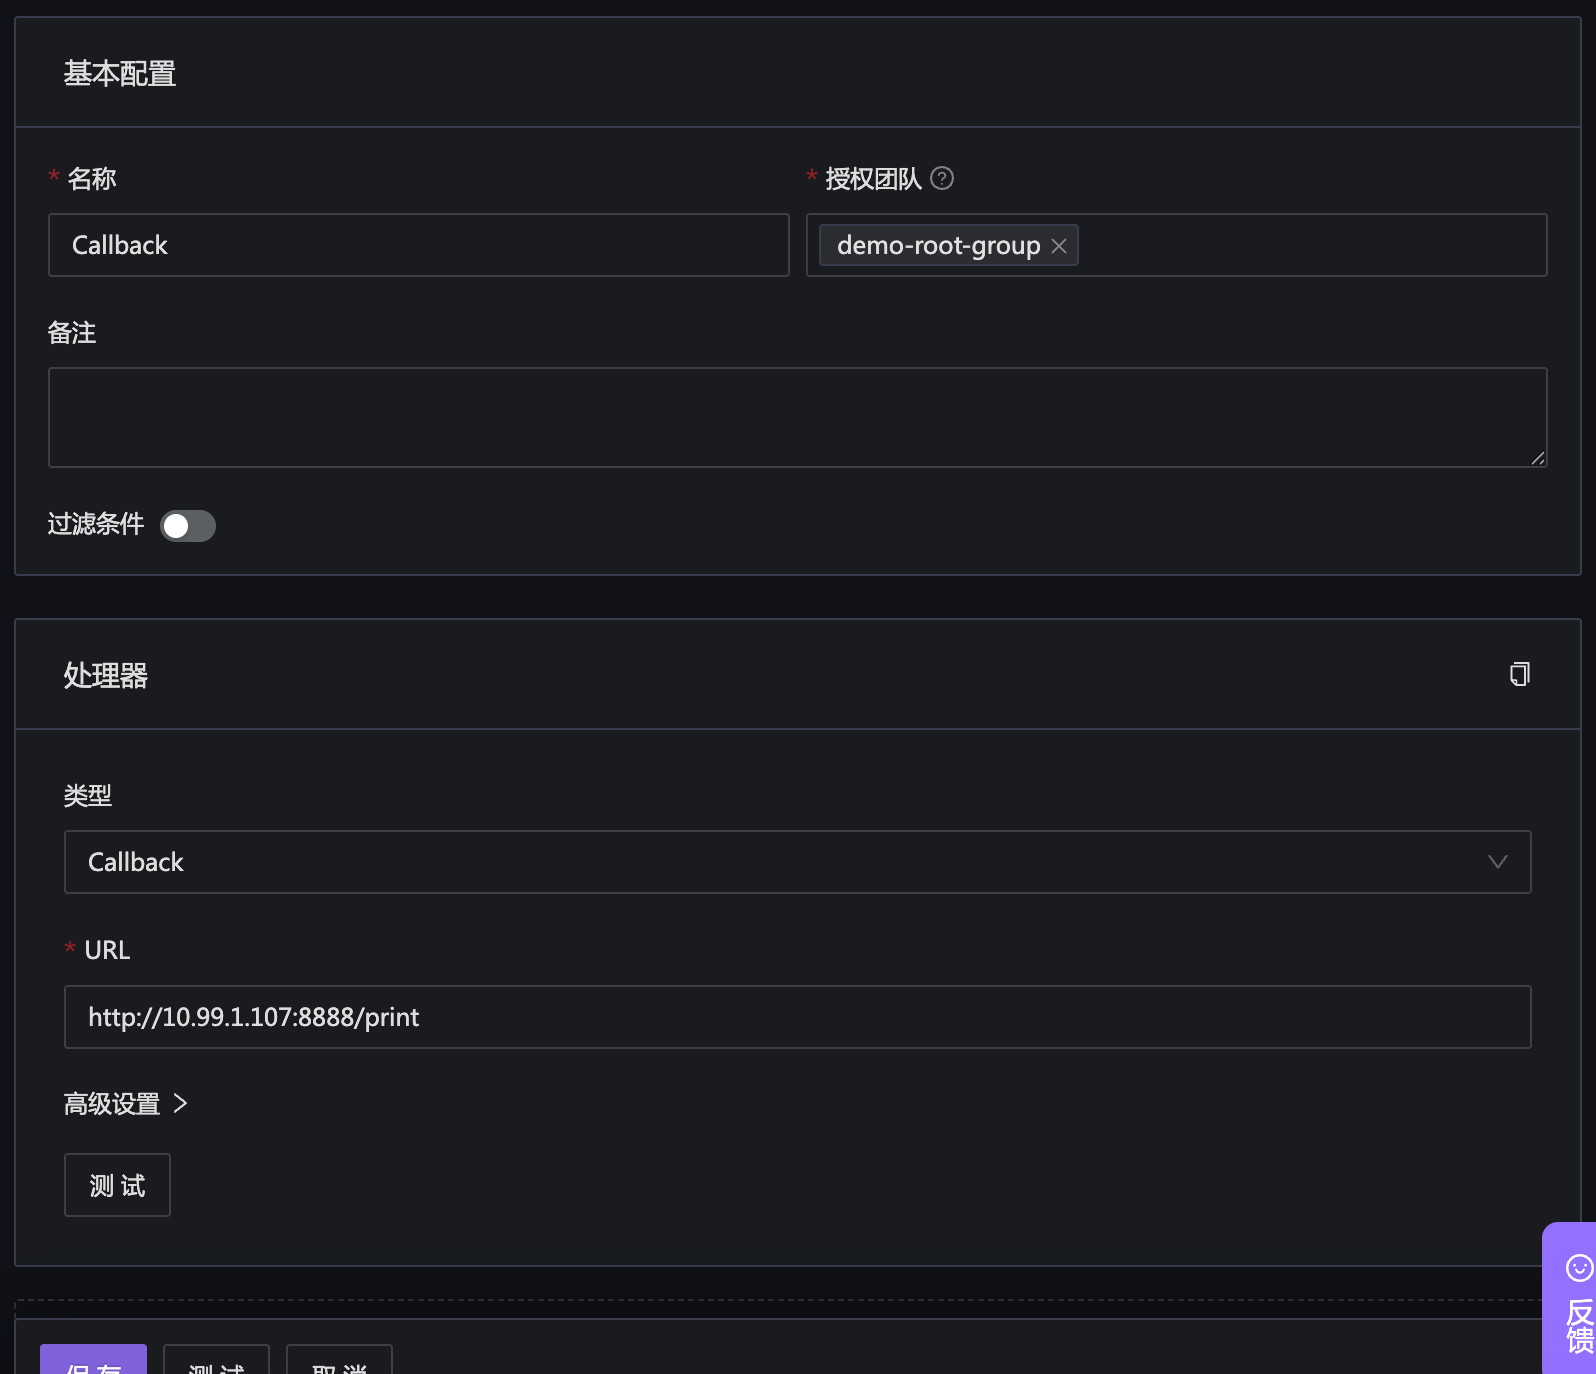
Here,
http://10.99.1.107:8888/printis a test program of mine, which can print the received HTTP requests for easy demonstration. This program is also an open-source small program, and the address is github gohttpd.
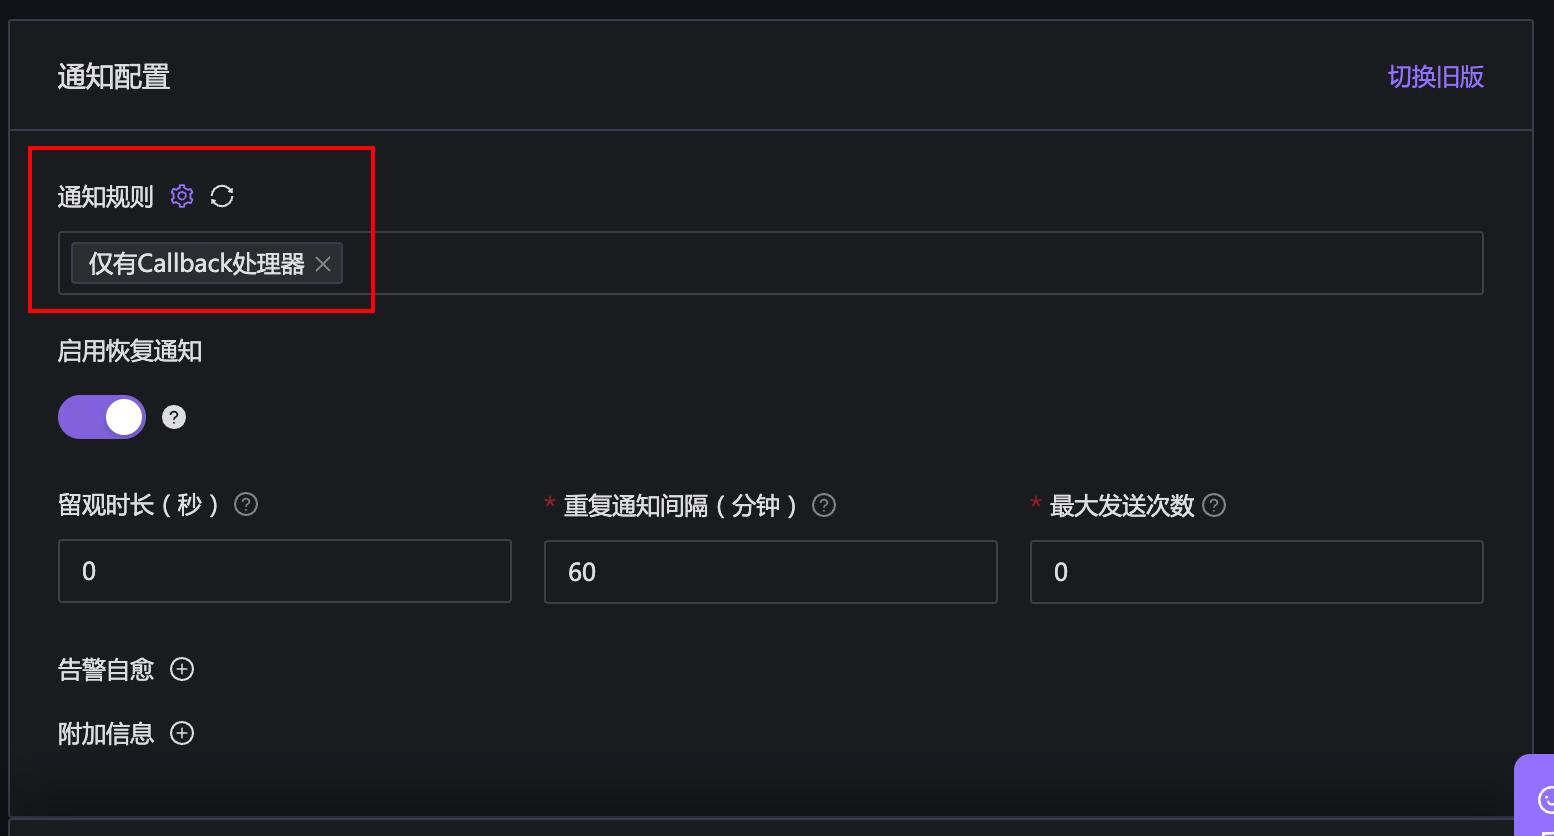
After creating the Pipeline, return to the notification rule page, and select the Pipeline just created in the event processing section.
Next, you can configure the “Alert Rule” for testing to see if the generated alerts can be received by the third-party program.
To see the effect as soon as possible, you can create an alert rule that will definitely trigger the threshold, and then select the notification rule just created in the notification rule:
Wait a moment and observe whether the program http://10.99.1.107:8888/print receives the callback HTTP request. The results seen in my environment are as follows:
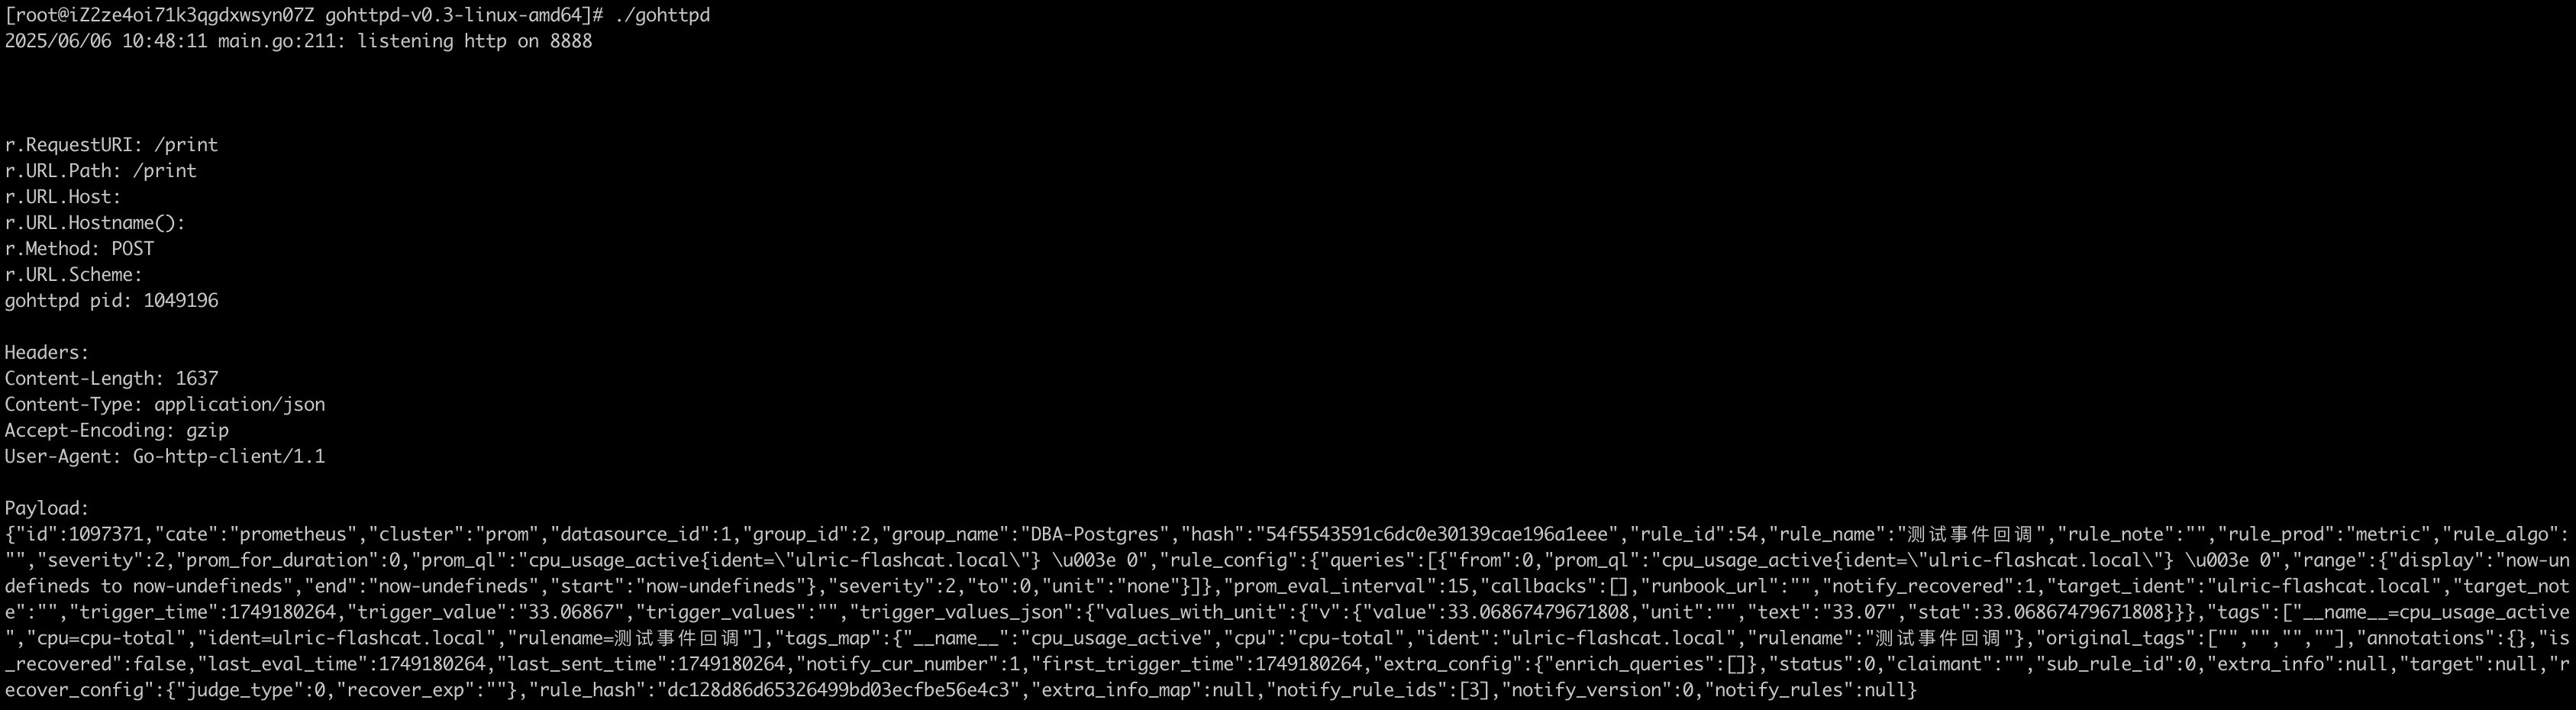
As can be seen from the above figure, the HTTP request contains information about the alert event, and its content is as follows:
{
	"id": 1097371,
	"cate": "prometheus",
	"cluster": "prom",
	"datasource_id": 1,
	"group_id": 2,
	"group_name": "DBA-Postgres",
	"hash": "54f5543591c6dc0e30139cae196a1eee",
	"rule_id": 54,
	"rule_name": "test-callback",
	"rule_note": "",
	"rule_prod": "metric",
	"rule_algo": "",
	"severity": 2,
	"prom_for_duration": 0,
	"prom_ql": "cpu_usage_active{ident=\"ulric-flashcat.local\"} \u003e 0",
	"rule_config": {
		"queries": [{
			"from": 0,
			"prom_ql": "cpu_usage_active{ident=\"ulric-flashcat.local\"} \u003e 0",
			"range": {
				"display": "now-undefineds to now-undefineds",
				"end": "now-undefineds",
				"start": "now-undefineds"
			},
			"severity": 2,
			"to": 0,
			"unit": "none"
		}]
	},
	"prom_eval_interval": 15,
	"callbacks": [],
	"runbook_url": "",
	"notify_recovered": 1,
	"target_ident": "ulric-flashcat.local",
	"target_note": "",
	"trigger_time": 1749180264,
	"trigger_value": "33.06867",
	"trigger_values": "",
	"trigger_values_json": {
		"values_with_unit": {
			"v": {
				"value": 33.06867479671808,
				"unit": "",
				"text": "33.07",
				"stat": 33.06867479671808
			}
		}
	},
	"tags": ["__name__=cpu_usage_active", "cpu=cpu-total", "ident=ulric-flashcat.local", "rulename=test-callback"],
	"tags_map": {
		"__name__": "cpu_usage_active",
		"cpu": "cpu-total",
		"ident": "ulric-flashcat.local",
		"rulename": "test-callback"
	},
	"original_tags": ["", "", "", ""],
	"annotations": {},
	"is_recovered": false,
	"last_eval_time": 1749180264,
	"last_sent_time": 1749180264,
	"notify_cur_number": 1,
	"first_trigger_time": 1749180264,
	"extra_config": {
		"enrich_queries": []
	},
	"status": 0,
	"claimant": "",
	"sub_rule_id": 0,
	"extra_info": null,
	"target": null,
	"recover_config": {
		"judge_type": 0,
		"recover_exp": ""
	},
	"rule_hash": "dc128d86d65326499bd03ecfbe56e4c3",
	"extra_info_map": null,
	"notify_rule_ids": [3],
	"notify_version": 0,
	"notify_rules": null
}
The test is normal. If you have similar needs, you can use this Callback processor for integration and implement some automated logic in your program.
Event Update Processor
Among the event processors, there is also an Event Update processor, which is configured in the same way as Callback. Their working logic is also similar, with the following differences:
When Nightingale calls the Callback address, it does not pay attention to the HTTP Response, but when calling Event Update, it will take the content of the HTTP Response as a new alert event for subsequent processing.
Therefore, as the name suggests, Event Update is used to modify alert events. It is usually used to attach some additional information to alert events, such as:
- Submitting the event to AI for analysis, obtaining some conclusionary information, and attaching it to the event
- Querying some metadata from CMDB and attaching it to the event
Note that the structure of the alert event cannot be modified arbitrarily. For example, directly adding a field at the top level of the JSON will not be recognized by subsequent processes. It is usually recommended to attach new content to the annotations field. In the example of my Callback processor above, annotations is empty, so the data structure cannot be seen. Actually, annotations is a map structure where both the map key and map value are string types. When you want to attach content, you also need to follow this structure.
Advanced users can also modify other fields of the Event, but you need to be clear about the impact of your modifications on subsequent processes. Ordinary users only need to attach content to the
annotationsfield and then serialize the entire new Event into JSON and put it in the body of the HTTP Response.
Event Drop Processor
Among the event processors, there is also an Event Drop processor, which, as the name implies, is used to discard alert events. For example:
- In some scenarios, although an alert event is generated, you do not want to proceed with the subsequent notification logic. In this case, you can use the Event Drop processor to discard the event.
To drop some alert events, filtering must be done. Usually, filtering can be done using various fields such as tags, annotations, and levels. The filtering rules may be very complex. How can this function be designed to be so flexible? We came up with a slightly complex but extremely flexible method, which is that users directly configure a section of template using go template syntax. The template can reference alert events and use syntax such as if for filtering. As long as the final rendered result of this go template is true, the event will be discarded.
For specific usage instructions, click Usage Instructions next to the Event Drop event processor type field on the Nightingale page to view them.
AI Summary Processor
The documentation for the AI Summary processor is also complete, as shown in the following figure:
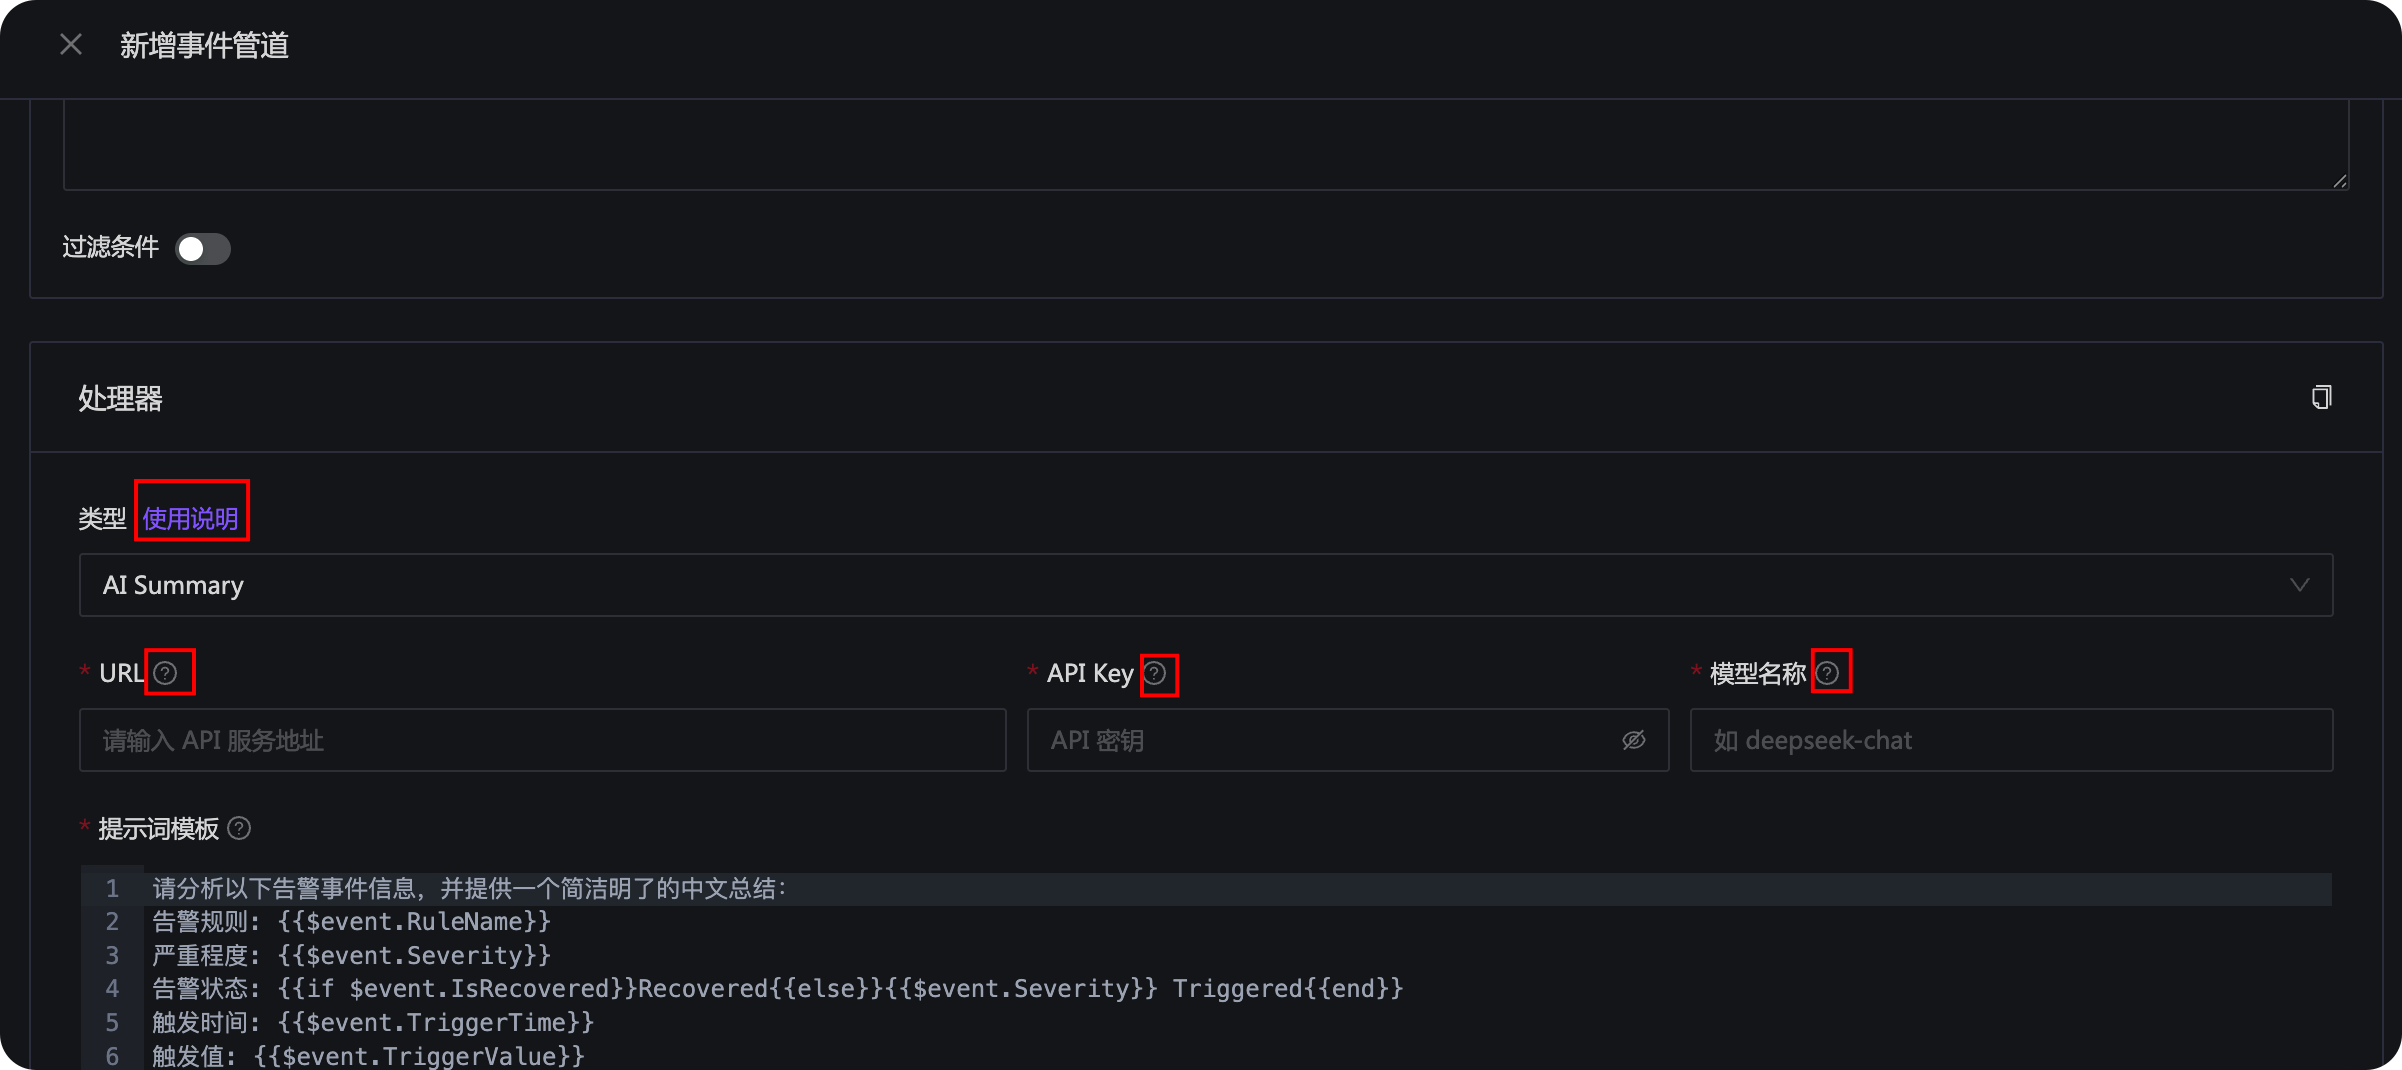
Click Usage Instructions next to the AI Summary event processor type field to view the usage documentation of the AI Summary processor. There is a small question mark icon on the right side of each field below, and you can also see relevant prompt instructions when you move the mouse over it.